SSH Forwarding (Part 2)
Again nothing earth-shattering here, a simple exercise building on the previous post.
What do we want to do?
This time we want to build a tunnel from a Windows host to a Linux one using the ssh utility Putty and then connect back to the Windows host down the tunnel using a remote desktop program.
The Lab Setup
You’ll notice the employment of the same diagram to save effort but with different ip addressing to catch those sleeping at the back; this time the Linux host has the ip address 10.20.10.60 and the Windows host has the ip adddress 10.20.10.30
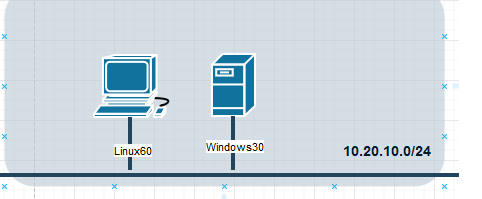
Scenario Overview
We’ll connect out from Windows using ssh on the standard port 22 as that’s what our Linux host is listening on. I didn’t set the Linux host to listen with an ssh sever on port 80 as I did last time mainly because I forgot to but it could easily be done. BTW, I should say all ports mentioned are tcp unless otherwise stated.
Unlike Linux, Windows doesn’t come with a pre-installed ssh utility but there is a superb free one called Putty. (https://putty.org/) which can be downloaded and installed or just run as an executable. This is written by one man, Simon Tatham, and is probably used millions of times by millions of people every day. Kudos to Mr Tatham for his generosity in releasing this quality of software without cost.
Having doffed our cap to Mr T, we move on. Putty has many features and connecting to our Linux host is the most basic of them; we pop in the ip address in and click the ssh radio button as demonstrated in Figure 2:
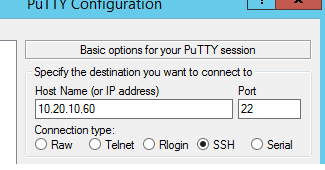
Ah, ah, but not so fast. We have to delve elsewhere before we connect. To create a tunnel which the Linux host can connect we head to the ‘Tunnels’ menu…
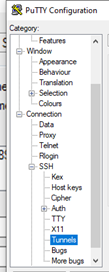
And selecting this the right pane of the Putty GUI will display:
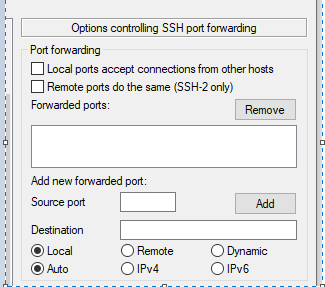
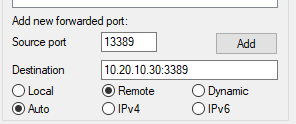
This is going to be a remote tunnel so select the ‘Remote’ radio button and choose a random high port, I’ve chosen my favourite number: 13389.
The destination ip address is going to be that of the Windows server we’re actually working on as we’re telling the tunnel where to come back to. Also if we add ‘:3389’ on the end of this it will tell the returning connecton to use tcp 3389 which is the standard port for remote desktop. So putting that altogether, you should see what’s show in Figure 4
Now, if clicking the ‘Add’ button; the following tunnel should appear.
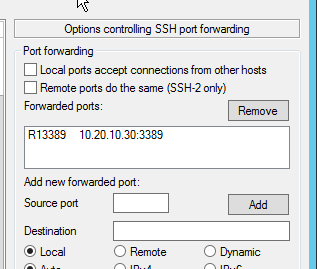
What we’ve asked Putty to do is to connect to 10.20.10.60 create a listener on that very same host on port 13389, the mouth of the tunnel if you like, which pops out on 10.20.10.30 on port 3389 where there should be a handy listener for RDP.
Windows reaches out.
Now, having defined our tunnel, if we go back to the main menu in Figure 2 and press ‘open’ we will connect to the Linux host and login as per usual.

Are you listening?
And, we ask ourselves, has the magic portal been created on port 13989? Taking a look (see Figure 8) it looks like it has.

Now, using the Linux RDP client Remmina, we are going to connect to our loopback using port 13389 and go down the tunnel to our Windows host.
Thus, if we had a simple port filtering device disallowing us to connect over RDP we would have defeated it.
I hadn’t used Remmina, the Linux RDP client, before but it was very user friendly and where the server ip address was to be specified I put in the loopback address with the port 13389 and the username and password of the Windows hosst.

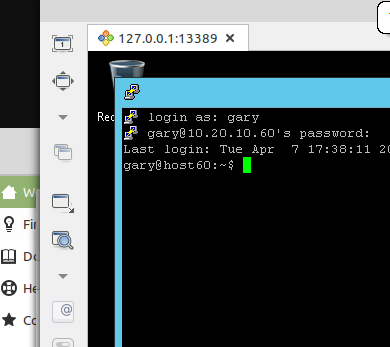
And this connected just fine. I captured this happy moment in a somewhat half-arsed fashion in Figure 10 – the RDP session is the background window. I did think of getting a better one but I have since deleted all the VMs used in the lab but I think you can make out the Windows ‘Recycle Bin’ – in the Remmina window .
