Smashing in SAML
My aim in this post is to get administrator access to a Palo Alto firewall using SAML authentication. The theory of this proccess is well-documented. Here is a explanation of it from Palo themselves:
https://knowledgebase.paloaltonetworks.com/KCSArticleDetail?id=kA10g000000ClVvCAK
In summary, SAML allows federated authentication: basically we have a service provider (SP) and an identity provider (IdP) who trust each other. So when a user tries to authenticate to the SP, they are redirected to the IdP where the user has an account. The user inputs their credentials to prove this, and is then rewarded with a SAML assertion which the user then presents to the SP. As the SP trusts the IdP, it consumes the assertion and allows the user the appropriate access using the contents of the assertion.
Our lab looks something like this (None of annoying infrastrucure an enterprise would have such as firewalls, proxies, load-balancers etc)
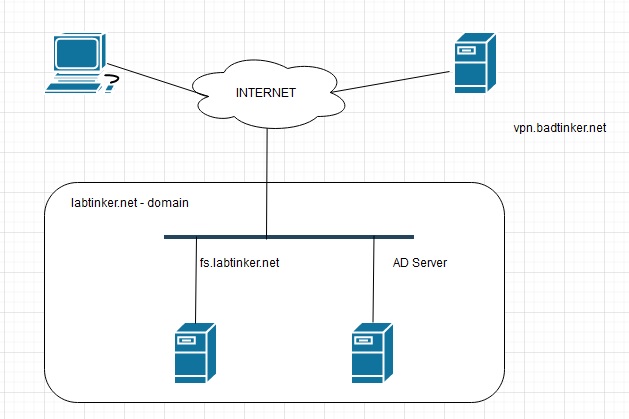
In the rectangle we have two AWS Windows 2016 servers. The AD server is the PDC for the Active Directory domain. On the server fs.labtinker.net we have ADFS (Active Directory Federation Service) installed or will have; and vpn.badtinker.net is a Palo Alto firewall spun up in Azure (bundle2) . My domains badtinker.net and labtinker.net are both in AWS Route 53 so DNS changes are easy enough.
ADFS Installation
So I joined fs.labtinker.net to the labtinker.net AD domain and then installed ADFS as below:
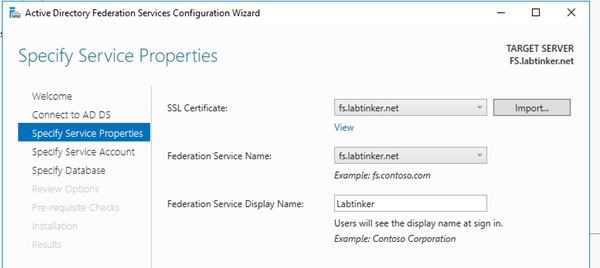
Oh… I had to get hold of a certificate and install this on this box before I could select it, so I had added this this in my local machine store:

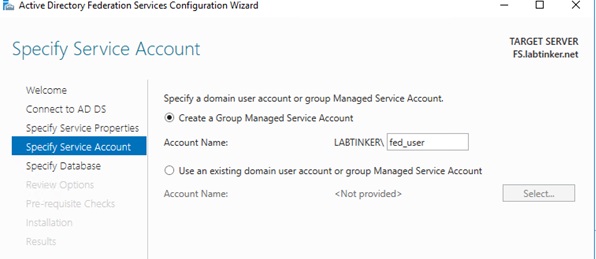
We specify a service account then create a database.
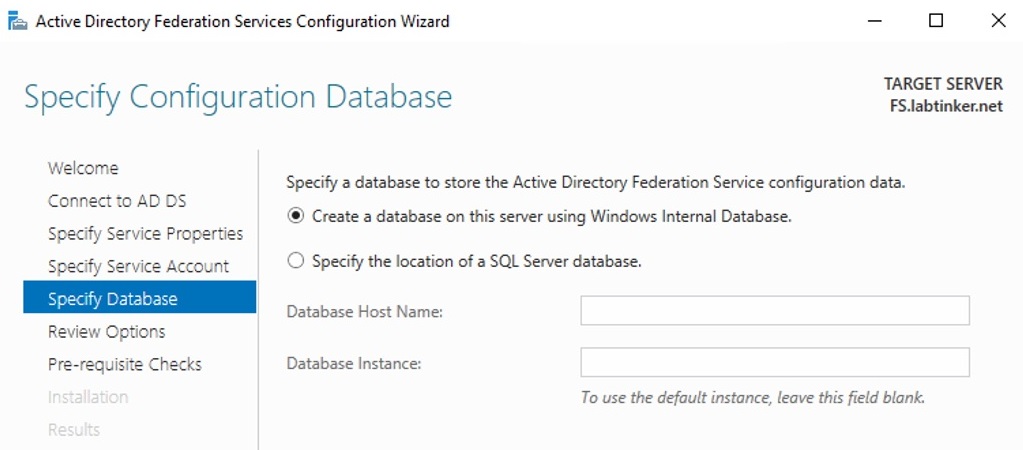
This process should create an SPN and we can confirm that with the following command (after logging into a domain account):

AD Server Config
There’s not much we need to do on the AD server itself apart from add a user. In this example I’m using John which I have already added.
Palo Alto
On the Palo Alto we will need to define a SAML IdP. The easiest way to do this is to import the metadata from the ADFS server. As long as we have our DNS entry set up for fs.labtinker.net this can be imported from the URL you find in AD FS Endpoints.


Namely:
https://fs.labtinker.net/FederationMetadata/2007-06/FederationMetadata.xml
You will be able to browse to this and save an XML (not when you’re reading this as I’ll have shut down the lab – those cloud fees rack up.)

Put that to one side and log into your Palo Alto – we will also need to add a DNS entry for vpn.badtinker.net and also import a certificate of the same name into the Palo’s cert store.
Add SAML Identity Provider
On the Palo Alto’s device menu, we pop down to the SAML Identity Provider Screen:

We have an ‘Import’ action and we name our IdP server and then browse to the ADFS metadata file. For my lab, I unticked the ‘Validate Identity Provider Certificate’ and increased the clock skew.. the latter I think unecessary but was a hangover from some troubleshooting, the former is necessary as we would need our IdP signing cert to be issued by a CA and it’s not – see below.

Having done this you’ll get a server entry and if you click on this you’ll see what’s in the metadata…

Notice the IdP cert is crt.labtinker.shared. This is a self-signed cert our ADFS created and included in metadata so we should find it in the Palo’s cert store as indeed we do.

As this is a self-signed certificate, if we’d have checked ‘Validate Identity Provider Certifcate’, the Palo would try and check this online and find it couldn’t. There are ways to configure the ADFS server to use a CA-issued certificate but we haven’t here.
OK, now we need to create an Authentication Profile which again is on the Palo’s device menu.

We name it ‘saml’, or I did, specify the Type as ‘SAML’ and for the IdP Server profile select the certificate vpn.labtinker.net (installed earlier – with its private key – the public key of this will be included in the metadata we generated for the ADFS). We’ll keep the attribute we are using as username so this is what we’ll expect to see in the SAML assertion from the ADFS.

The ‘Advanced’ tab allows us to restrict this to given users, we’ll just add ‘any’.

Having done this you’ll see the following…

You’ll notice there’s a metadata link here which will provide the metadata file we need to provide to the ADFS. Clicking on this, we need to fill in a couple of things. The service will be ‘managment’, the authentication profile is ‘saml’ and the ip or hostname is https://vpn.badtinker.net.

OK – save this file away – we’ll need it back on our ADFS server.
We need to do one more thing on the Palo and add a SAML admininstrator with the username that we’ll present in our assertion and map this to our ‘saml’ authentication profile.

Back on the ADFS server…
We need to tell the ADFS server about the Palo by adding it as a Relying Party in the AD FS Tool.

Clicking on the ‘Add Relying Party Trust’ sends us into a wizard.


We then are given a chance to import the Palo’s metadata.

Here I input the metadata file I generated on the Palo then allowed all access to finish off.
The relying party I named ‘Palo’ has the URL and public cert of the Palo in it…


OK, we’re not quite done. We need to tell the ADFS server what claims to send. We can stuff our assertion with no end of them but on this occasion we just want username so… we click on add ‘Claims Issuance Policy’


So this is what we send to the Palo. Now there’s one more thing I had to do to get this working and it you’re troubleshooting in a none-Production environment this may be worth doing anyway.
I ran the following command on the ADFS server where ‘Palo’ was the name of the relying party.
set-ADFSRelyingPartyTrust –TargetName Palo –EncryptClaims $False
As you might gather this means that the assertions that the ADFS sends to the Palo are not encrypted with the Palo’s public key of the vpn.badtinker.net certificate. You can still seem these claims if they are encrypted (if you have the private key) by using an online tool but this exposes the key to a third party. I will perhaps go into this a little deeper in subsquent post.
Anyway, let’s give this a try. We’ll browse to the Palo’s GUI on
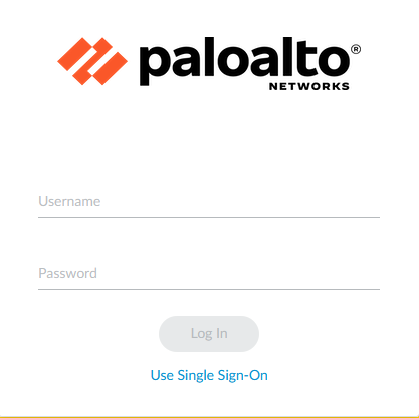
Choose ‘Use Single Sign-On’ and then input the SAML Administrator we created earlier (it’s case sensitive):

This will re-direct us to our ADFS server on https://fs.labtinker.net

and here we sign in using our labtinker domain account:

On a successful authentication this will re-direct back to Palo with the correct assertion.


Next post I’ll dig a little bit more into what’s going on and demonstrate a couple of SAML tools.